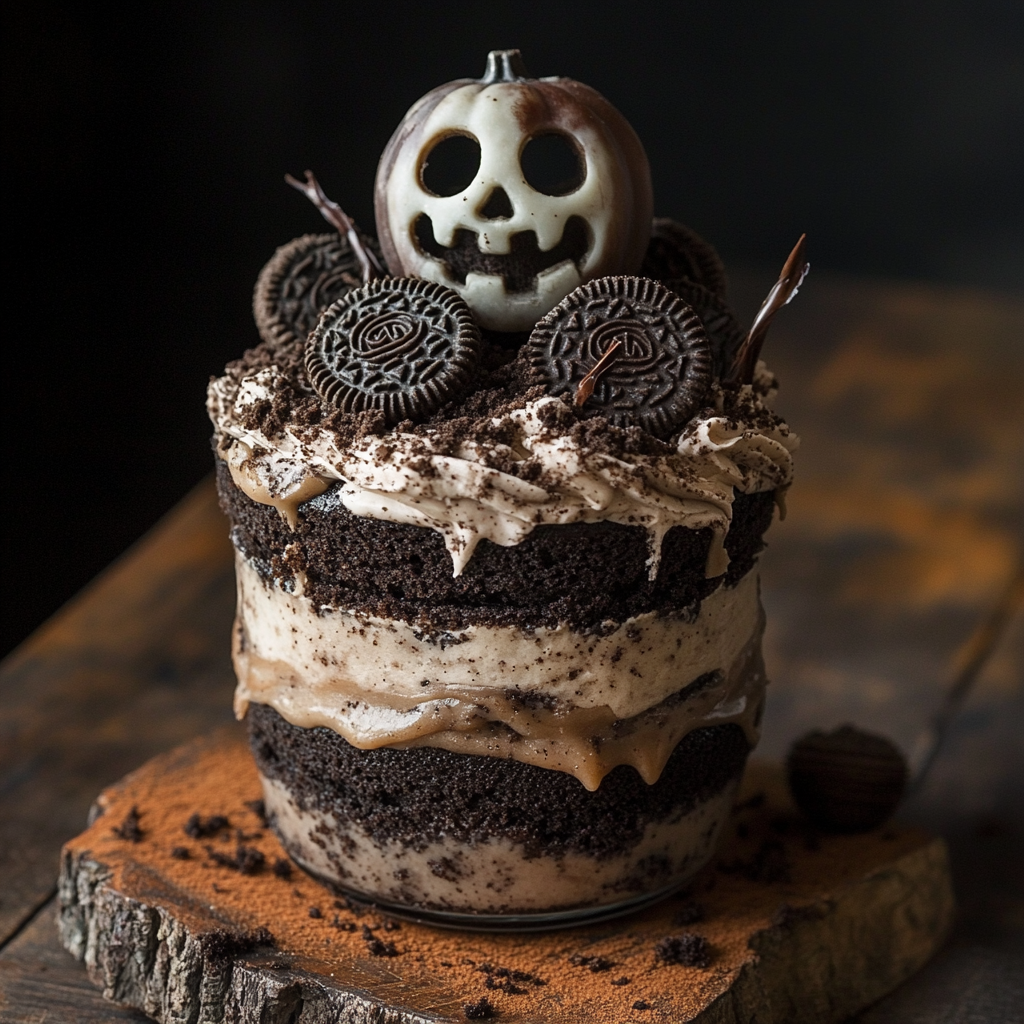
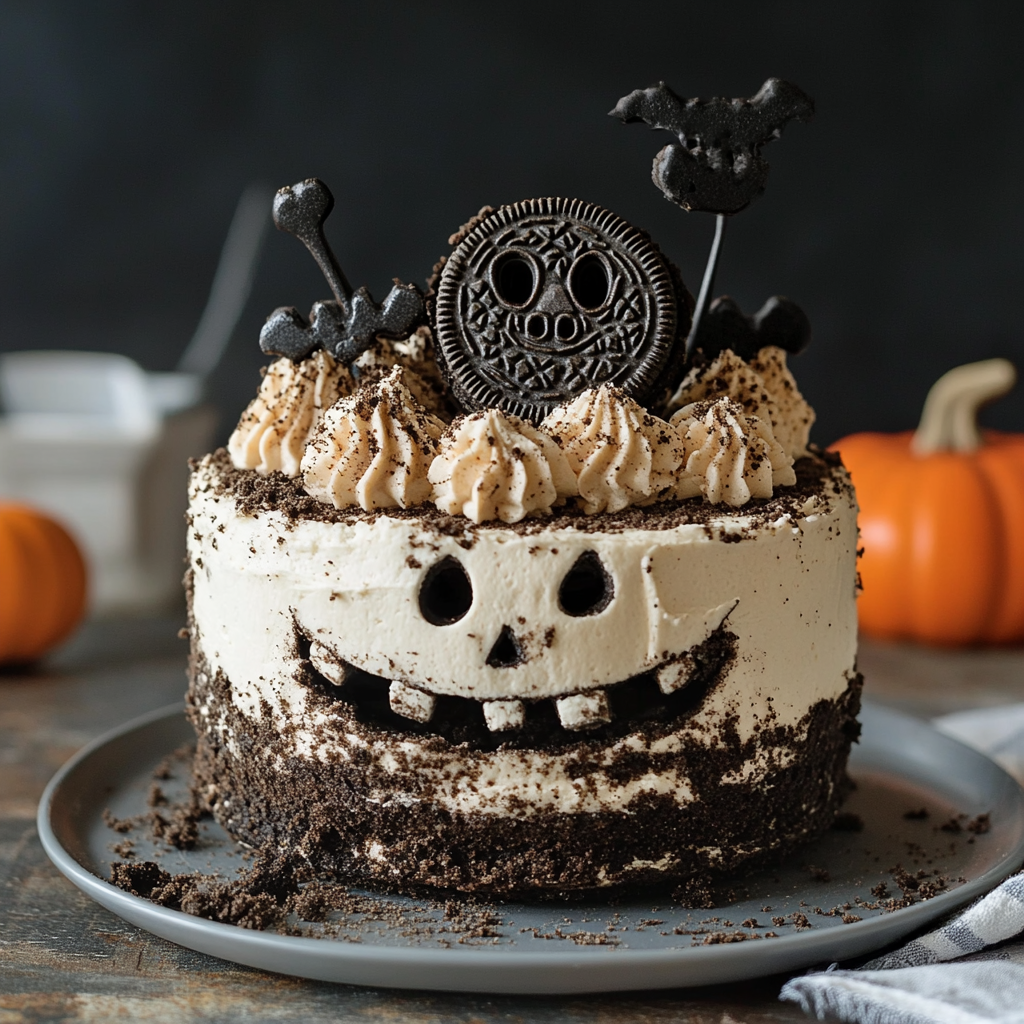
Halloween Oreo Dirt Cake
A spooktacular treat for Halloween, the Halloween Oreo Dirt Cake is a delightful dessert that combines layers of creamy filling, orange-tinted pudding, and crushed Halloween Oreos. This no-bake confection is not only easy to prepare but also perfect for Halloween parties, gatherings, or any festive occasion.
Why You’ll Love This Recipe
- Quick and Easy: This no-bake dessert can be whipped up in just a few simple steps.
- Festive Appearance: The vibrant orange color and fun toppings make it a standout on any dessert table.
- Delicious Layers: Enjoy the perfect blend of creamy, crunchy, and sweet flavors with each bite.
- Customizable Toppings: Add your favorite sprinkles or crunchy bits to personalize it for your guests.
- Feeds a Crowd: This recipe serves 16 people, making it ideal for large gatherings.
Tools and Preparation
Having the right tools will make preparing your Halloween Oreo Dirt Cake a breeze. Here’s what you’ll need to get started.
Essential Tools and Equipment
- Mixing bowls
- Electric mixer
- Measuring cups
- Whisk
- 9×13 inch baking dish or individual cups
Importance of Each Tool
- Electric mixer: Saves time and ensures smooth mixing of ingredients like butter and cream cheese.
- Measuring cups: Accurate measurements are crucial for achieving the perfect flavor and texture in your cake.
Ingredients
– 2½ to 3 packs Halloween Oreos (30 oz), plus extra for topping
– 4 boxes instant vanilla pudding (3.4 oz each)
– 6½ cups cold milk
– 1 cup butter, softened
– 16 oz cream cheese, softened
– 2 cups powdered sugar
– 2 tsp vanilla extract
– 16 oz Cool Whip, thawed
– Orange food coloring
– Halloween sprinkles
– Optional: ½ tsp cinnamon
– Optional: Crushed pretzels or toffee bits for topping
How to Make Halloween Oreo Dirt Cake
Step 1: Crush the Oreos
First, crush the Halloween Oreos in a zip-top bag or food processor. Reserve about ½ cup of the crushed Oreos for garnish later. Press most of the crushed Oreos into the bottom of a greased 9×13 dish or individual serving cups to form the base layer.
Step 2: Prepare the Cream Mixture
In a mixing bowl, beat together the softened butter, cream cheese, powdered sugar, and vanilla extract until smooth. Once combined, fold in half of the thawed Cool Whip gently until well mixed.
Step 3: Make the Pudding Layer
In another bowl, whisk together the instant vanilla pudding mix with cold milk until thickened. Add in a few drops of orange food coloring to achieve your desired hue.
Step 4: Layer Your Dessert
Begin layering your dessert by spreading half of the cream mixture over the crushed Oreos in your dish. Next, pour over the orange pudding layer evenly. Finally, top this with the remaining Cool Whip.
Step 5: Add Toppings
Sprinkle the reserved crushed Oreos on top along with colorful Halloween sprinkles. If you like some crunch, consider adding optional toppings like crushed pretzels or toffee bits.
Step 6: Chill Before Serving
Cover your dessert with plastic wrap and chill in the refrigerator for at least four hours or overnight. This allows all flavors to meld beautifully before serving.
Enjoy creating this festive Halloween Oreo Dirt Cake, perfect for impressing guests at your next Halloween celebration!
How to Serve Halloween Oreo Dirt Cake
Serving Halloween Oreo Dirt Cake is all about presentation and creativity. This no-bake dessert can be served in various ways to add a festive touch to your Halloween celebrations.
Individual Cups
- Use small clear cups for serving. Layer the cake in each cup for a beautiful display that allows guests to enjoy their own portion.
Cake Slices
- Cut into squares or rectangles if serving from a baking dish. Each slice can be garnished with extra crushed Oreos and sprinkles for an eye-catching treat.
Dessert Table Centerpiece
- Place the entire dish on a dessert table as a centerpiece. Surround it with Halloween-themed decorations like mini pumpkins and spooky candles.
Party Favors
- Fill small containers with leftovers to send home with guests. This makes for a sweet reminder of the fun they had at your party.
Children’s Parties
- Decorate individual servings with festive toppers like gummy worms or candy eyes to make them more appealing for kids.
How to Perfect Halloween Oreo Dirt Cake
To ensure your Halloween Oreo Dirt Cake turns out perfectly, consider these helpful tips:
- Chill time is crucial: Allow the dessert to chill for at least 4 hours or overnight. This helps the layers set properly and improves flavor blending.
- Use cold milk: Make sure your milk is cold when mixing with pudding. This guarantees a thicker texture and better consistency.
- Crush Oreos finely: For the best results, crush the Oreos into fine crumbs. This creates a smoother layer and enhances the overall texture of the dessert.
- Customize colors: Adjust the amount of orange food coloring based on your preference. You can create lighter or darker shades to suit your theme.
- Add optional flavors: Experiment by adding cinnamon or other spices to the cream mixture for an extra flavor dimension that complements the dessert.
Best Side Dishes for Halloween Oreo Dirt Cake
Pairing side dishes with Halloween Oreo Dirt Cake enhances your spooky feast. Here are some delicious options:
- Pumpkin Soup – A warm, creamy pumpkin soup adds seasonal flavors that harmonize beautifully with the dessert’s sweetness.
- Witch’s Finger Breadsticks – These savory breadsticks shaped like fingers are perfect for dipping in marinara sauce, adding a fun twist to your meal.
- Spooky Salad – A vibrant mixed greens salad topped with orange and black ingredients (like mandarin slices and olives) adds freshness to balance the richness of the cake.
- Ghostly Deviled Eggs – Classic deviled eggs decorated with olive slices can resemble little ghosts, adding both charm and protein to your spread.
- Candy Corn Fruit Cups – Layered fruit cups resembling candy corn are refreshing, colorful, and reinforce the Halloween theme while being healthy.
- Cheesy Monster Quesadillas – Fun-shaped quesadillas filled with cheese and veggies make for a playful addition, appealing especially to kids at your gathering.
Common Mistakes to Avoid
Making Halloween Oreo Dirt Cake is simple, but small mistakes can spoil the fun. Here are some common pitfalls to avoid:
- Boldly crush Oreos correctly: Crushing Oreos too finely can turn them into dust. Aim for a mix of fine crumbs and larger pieces for texture.
- Boldly measure ingredients accurately: Use precise measurements for pudding and milk. Too much liquid can make the layers runny, while too little can yield a dry cake.
- Boldly chill adequately: Skipping the chilling time can lead to a cake that doesn’t set properly. Make sure to chill for at least 4 hours or overnight for best results.
- Boldly layer properly: Layering the ingredients in the wrong order can affect the presentation and taste. Follow the layering instructions strictly for a stunning dessert.
- Boldly customize wisely: Adding too many extras can overwhelm flavors. Stick to a few toppings like sprinkles or crushed pretzels for balance.
Storage & Reheating Instructions
Refrigerator Storage
- Store in an airtight container.
- Best consumed within 3-5 days for optimal freshness.
- Keep refrigerated until ready to serve.
Freezing Halloween Oreo Dirt Cake
- Freezing is possible but may change texture.
- Wrap tightly in plastic wrap and then foil.
- Best eaten within 1-2 months if frozen.
Reheating Halloween Oreo Dirt Cake
- Oven: Preheat to 350°F (175°C). Cover with foil and heat for about 15 minutes.
- Microwave: Heat individual slices on medium power for about 30 seconds.
- Stovetop: Not recommended, as it could affect texture.
Frequently Asked Questions
Here are some FAQs about making Halloween Oreo Dirt Cake:
What is Halloween Oreo Dirt Cake?
Halloween Oreo Dirt Cake is a festive twist on traditional dirt cake made with crushed Halloween Oreos, creamy layers, and orange pudding.
Can I make Halloween Oreo Dirt Cake ahead of time?
Yes! This dessert is perfect for making ahead. It requires at least 4 hours of chilling, so prepare it the day before your event.
How do I customize my Halloween Oreo Dirt Cake?
You can add different toppings like gummy worms or candy corn for extra fun. Also, consider using different flavored pudding or food colorings!
Is there a way to make this dessert healthier?
You can use reduced-fat cream cheese and Cool Whip, along with sugar substitutes in place of powdered sugar if desired.
How long does Halloween Oreo Dirt Cake last?
When stored properly in the refrigerator, it lasts about 3-5 days. If frozen, consume within 1-2 months for best quality.
Final Thoughts
Halloween Oreo Dirt Cake is not only delicious but also incredibly versatile. You can customize it with various toppings and flavors to suit your party theme or personal preferences. It’s a fun treat that everyone will love—so why not give it a try this Halloween?
Halloween Oreo Dirt Cake
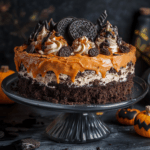
Indulge in the festive spirit with this Halloween Oreo Dirt Cake, a delightful no-bake dessert that combines creamy layers and crushed Halloween Oreos for a spooktacular treat. This easy-to-make dessert is perfect for parties and gatherings, boasting vibrant orange colors and customizable toppings that are sure to impress guests of all ages. The luscious blend of flavors—from smooth cream cheese to rich vanilla pudding—creates a delightful experience in every bite. Whether served in individual cups or as a centerpiece at your dessert table, this cake is bound to be a crowd-pleaser this Halloween season.
- Prep Time: 20 minutes
- Cook Time: None
- Total Time: 0 hours
- Yield: Serves approximately 16 people 1x
- Category: Dessert
- Method: No-Bake
- Cuisine: American
Ingredients
- 2½ to 3 packs Halloween Oreos (30 oz), plus extra for topping
- 4 boxes instant vanilla pudding (3.4 oz each)
- 6½ cups cold milk
- 1 cup butter, softened
- 16 oz cream cheese, softened
- 2 cups powdered sugar
- 2 tsp vanilla extract
- 16 oz Cool Whip, thawed
- Orange food coloring
- Halloween sprinkles
Instructions
- Crush the Halloween Oreos and reserve about ½ cup for garnish. Press most into the bottom of a greased 9×13 inch dish.
- In a bowl, beat together softened butter, cream cheese, powdered sugar, and vanilla extract until smooth. Fold in half of the Cool Whip gently.
- In another bowl, whisk instant vanilla pudding mix with cold milk until thickened and stir in orange food coloring.
- Layer half of the cream mixture over the crushed Oreos, followed by the orange pudding layer. Top with remaining Cool Whip.
- Sprinkle reserved crushed Oreos and Halloween sprinkles on top.
- Chill covered for at least four hours or overnight before serving.
Nutrition
- Serving Size: 1 piece (approximately 100g)
- Calories: 350
- Sugar: 28g
- Sodium: 220mg
- Fat: 21g
- Saturated Fat: 10g
- Unsaturated Fat: 8g
- Trans Fat: 0g
- Carbohydrates: 37g
- Fiber: 1g
- Protein: 4g
- Cholesterol: 30mg